Move files into the Documents area from another document management system
Follow these guidelines when you move files from another document management system Onvio.
Note: If you are migrating files from FileCabinet CS to Onvio, see Migrate FileCabinet CS data to Onvio Documents.
Set up a folder template
We recommend that you use a folder template to maintain organization when moving files into Onvio.
If you haven't done so already, set up a template for the files you are moving.
Structure the template using one of the following hierarchies.
- [Document category as top-level folder] > [Prior tax years as sub-folders]
Example
Workpapers > 2016; 2015; 2014
- [Prior tax year folder as top-level folder] > [Document category folders]
Example
2016 > Workpapers; Notices; Balance Sheets; Tax Returns
Move files into Onvio
- Open the applicable client in Onvio.
- Click the Add Folder icon and enter a name for the top-level folder.
- Optional: Select a template.
- Click Save.
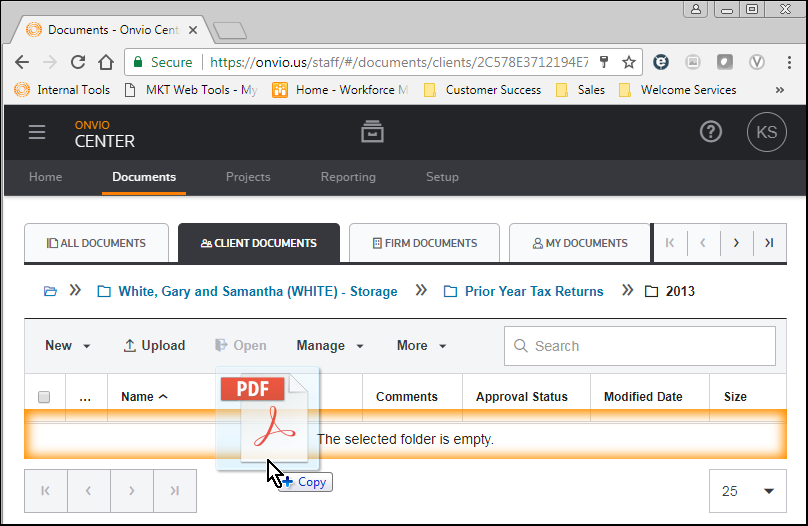
- Drag and drop folders or single files into the desired folder. Show me.
You can also move your files into Onvio using the following methods.
- Click the Upload button in the toolbar.
- Add files directly from Dropbox, Google Drive, or Box by clicking the Cloud menu in the toolbar.
- Scan documents into the Documents area.
- Add files from your desktop through the Print command using the Onvio print driver.
Notes:
- You can add several file types to Onvio.
- You can drag and drop folders into Onvio only when the application is open in Google Chrome or Firefox.
- The maximum size for file uploads to Onvio is 500MB.
- Larger files may take several minutes to upload. You can continue to work in Onvio during the upload process.
Contact us
Call 800-968-0600

 Show expandable text
 Hide expandable text